Tips For Cleaning Your Car Like A Professional

car-clean

Your car is an important part of your life. You probably spend at least one part of every day sitting in it, but yet we don’t seem to keep it as clean as we do our home. It can be a major effort to clean your car yourself, but it’s a necessary evil to keep your paintwork looking as fresh and shiny as it did the day that it left the dealership. Here are our top tips for cleaning your car like the professionals do.

Exterior

  • Firstly, never clean your car in direct sunlight, heat or after a long drive – when the car is hot, the wash will leave water stains and the strength of the chemicals will be affected.
  • Clean the dirt off your car using a hose pipe before you wash it with any products – this will help get any dirt off that could scratch the paintwork as you wash.
  • After you have rinsed the car, start by cleaning the wheels as this is the dirtiest part.
  • As you clean your wheels, if you use a wheel cleaner, always check that it can be used on your type of wheel- special care should be taken with alloys.
  • When you move onto the windows, remember to roll them down before you clean – the top of the window has the most dirt and your hard work will be undone if you don’t clean it.
  • When you have cleaned the glass, buff it using a micro fibre cloth.
  • When you have washed the car, do not let it air dry or take it for a drive to dry it, dry it using a chamois cloth in a blotting motion – doing the former will leave water marks on the paintwork.
  • Before waxing the car, use a clay brick to get stubborn marks off the paint.
  • Wax the car once you have cleaned it to protect it from future stains (and give yourself an easier job next time you come to wash the car)

Interior

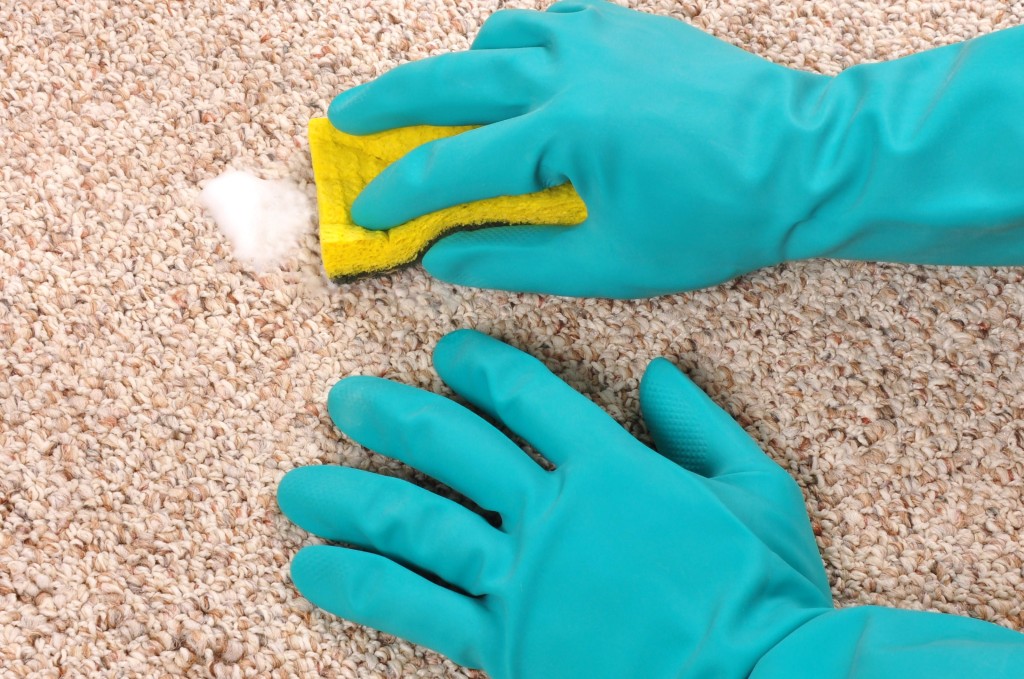
  • Lift out the mats and use a stiff brush to loosen the dirt before you vacuum them – this also works on the carpet.
  • Use a foam brush (available from craft shops) to dust the air vents.
  • Use a toothbrush and a small amount of dish soap to scrub the dirt embedded into the vinyl on your interior door and other surfaces.
  • Use a dry toothbrush to get into the seams between the window and your door.
  • Refrain from using silicone-based sprays inside the car – they will make it shiny but they will also make it slippery, which is potentially very dangerous, particularly on the pedals.
  • Use baby wipes to clean your dashboard and steering wheel.

General tips

  • Do the interior and exterior on separate occasions if you have to – don’t rush to do them both at once.
  • If you have concerns about which cleaning products you can use in your car, refer to the owner’s manual.
  • As the car has so many different materials, it’s always best to use a specific cleaner for each rather than a general cleaner.
  • If you can’t avoid washing your car in the sun, do it in sections to avoid streaks.
  • Keep your car clean by storing a plastic bag dispenser in the glovebox and taking your rubbish out often.
  • Take the mats out of your car weekly and give them a shake.

Keeping your car clean can increase the value of your car when you go on to sell it. A dealership is more likely to take a car that has been kept in good condition by its owner than they would a dirty car. Remember that if you have sold your car you need to inform the DVLA.

Top Tips For Removing Vomit From The Carpet

clean-carpet

Whether it is something as innocent as a young one who hasn’t been feeling well, or whether it’s something not quite so innocent as the aftermath of a night out, we have all found ourselves on our hands and knees trying to scrub sick off the carpet. It is a huge understatement to say that it’s not an entirely pleasant way to spend your time (and that’s just the smell) but you really don’t have a choice. Left to sit for too long, it could leave a repugnant odor on your carpet for the foreseeable future, or even worse, it could seep through to the floor boards. Then you’ve really got a problem.

Many people have their own unique pro-tip to clean up this mess, but this is what has worked for us in the past:

The first step is the worst. Rest assured that it can only get better from here. To begin with, you need to pick up as much of the vomit as you can. So get a pair of latex gloves, grab a spoon or a scraper of any kind, and hold your breath. Make sure to pick it up and not press it in – this is why we suggest a spoon or scraper – as it will only give you more work. Once you have got rid of as much as you can, give yourself a pat on the back (make sure to remove the gloves first!) and let’s start getting rid of the stain.

You will need to blot the area with some paper towels in order to absorb any of the liquid that remains. Once that’s done, grab yourself some corn starch or baking soda and sprinkle it over the area. Leave it for somewhere between 15 and 20 minutes. Vaccum it up and this will help to remove what is left.

Next up: the smell. The best way to ensure there isn’t a nasty odor hanging around is to apply a fairly liberal amount of enzyme cleaner (something like Rug Doctor or Pro Enzyme Odor will do the job) or water mixed with vinegar (if you can’t get to a shop at 1am after a heavy night). Blot this with some paper towers until all the remaining stain has been removed. All that remains now is to let it dry out and then vacuum the area.

The 5 Hardest To Clean Areas In Your Home (And How To Tackle Them)

Image via Flickr - https://www.flickr.com/photos/inf3ktion/

Image via Flickr – https://www.flickr.com/photos/inf3ktion/

Everybody is no doubt all too familiar with those tricky areas of the home that are just downright difficult to keep clean. Whether it’s a lack of time, a commonly overlooked spot or simply a place that’s awkward to get to, we all have those areas that we regularly put off cleaning.

But there are indeed easy ways to go about managing these tough spaces; ones that don’t require expensive cleaning products or the use of harsh chemicals. Not only will they save you time and money, they’ll also reduce the residue often left behind by common cleaners.

So get ready to roll up your sleeves…here’s how you can go about tackling five of the hardest to clean areas in your home.

1. The Shower Head

393381665_ee3a5b94cf_m

Image via Flickr – https://www.flickr.com/photos/markdodds/

The shower head is a common bane of most bathrooms, as the black grimy build-up between the holes are a nightmare to clean between.
But with a plastic sandwich bag and a bit of cheap white vinegar, you can have a sparkling clean shower head literally overnight. Simply fill the clear bag with the vinegar and secure it around the shower head with an elastic band. Leave it overnight or at least for a few hours – the vinegar will simply dissolve the dirt. No more scrubbing!

2. The Stove

Over-boiled pasta water…oil spatters…burnt-on food…the top of your stove can be a hazardous place for food spillages and stains, and often requires a lot of elbow grease to scrub clean.
Simply mix one tablespoon of salt with a tablespoon of baking soda, and add one tablespoon of water. Dip your cloth into the cleanser and use it to scrub away the dirt on your stovetop with ease. When rinsed thoroughly clean, your stove will gleam like new again without scratching or smearing. Or if that sounds like too much work, hire professional oven cleaners who don’t mind living in elbow grease for a living!

3. Wooden Furniture

The repeated use of polishes or wood cleaning sprays on your wooden furniture can leave a dull residue over time and reduce the natural shine of your beautiful wooden pieces.

Leave your everyday cleaning products in the cupboard and opt for a gentler, natural approach instead. Start by washing your furniture with warm soapy water (washing up liquid is fine) and rinse and dry very, very thoroughly. Combine one cup of olive oil with a quarter cup of white vinegar in a jar with a lid.

Shake before every use to blend and apply sparingly with a soft cloth – a little goes a long way. The vinegar with bust through dirt and the olive oil will soften and moisturise the wood, giving it a pleasant shine when buffed. This wood treatment should be applied no more than once a month, but you can clean the furniture in between using a dry, soft microfiber cloth.

4. Tile Grout

Grout is that awkward filler that lies between tiles in your kitchen or bathroom. White and grey grout in particular can become dull and grimy over time, or even darkened with mould in rooms with little ventilation. Whilst bleach products do work effectively, they can be harsh and should not be used on black grout as it will cause fading.

Tile & Grout

Why not make a natural tile cleaner instead by mixing white vinegar with baking soda to create a thick paste? After drying tiles thoroughly to remove dust, the mixture can be applied generously to grout using the corner of a cloth and left for 30 minutes whilst it soaks in. You may wish to reapply frequently as it soaks into the grout, but when you are satisfied with the coverage it can be scrubbed away using a hard-bristled brush to get between the tiles.
When done, remember to rinse and dry thoroughly. This solution can be used on both floors and walls.

5. Tops of Cabinets

We all try to forget about the dirt that collects on the tops of our kitchen cupboards, but it is still very much there. Grease from cooking, dust and residue from the humidity will gather over time and sit on top of our kitchen fittings, and even some cleaning agents can leave a further residue.

This hard-to-reach area can be cleaned easily with some white vinegar and baking soda. Start by wiping the cupboards down with a soapy water solution to remove dust and lint; then use the vinegar on a cloth to scrub the light patches of sticky residue. Tougher, stickier areas can be beaten with a mix of baking soda and water in equal parts to make a thick paste. Apply it liberally before scrubbing surface clean with a soft-bristled brush.

To keep your cabinet tops clean, simply lay wax paper over the top, cut to fit the depth and width of your fittings. Every few weeks the wax paper can be ditched and replaced with a fresh piece, bringing an end to tedious cleaning.

Having a reliable, dedicated cleaning service visit your home every month will give you extra peace of mind, taking care of all these tough spots, and more. No longer will you need to worry about those unglamorous, tricky areas you dread to face, and you’ll even be given tips on how to maintain your home in between visits.

Many cleaners will be able to negotiate a schedule you are happy with, so they’ll be there when you need them most. If you find that keeping your home spotless and gleaming is an endless cycle, then give a local cleaning company a call.

Adele Halsall is a budding cleaning wizard working at Skweeky Kleen, a commercial and domestic cleaning company based in Bristol, England.

Welcome To Can I Clean It!

Welcome to our sTenants-vacating-responsibilitiesmall space on the world wide web! Please bear with us as we set up this new venture and start producing the quality articles you’ll enjoy reading. What are we aiming to talk about? Well, we hope to share expert tips on cleaning for all sorts of rooms/situations/items that we’ve gained and gleaned from over 20 years experience in the cleaning industry.

Running our own cleaning agency, we also hope to post news and information related to the British cleaning industry. We are looking forward to getting excited! We hope you’ll stick around to see what time saving tips we’ll be sharing.